Tracking Time
How to use the timer and manually log time entries in Indema.
Written By Julia M.
Overview
Log time three ways: start a live timer, add a past entry, or import a CSV.
Before you start
Set up your services and roles (with their rates and billable setting) in Settings → Studio → Projects and phases → Services and roles. Every entry needs one.
1. The live timer
Click Start Timer in the top bar. It's there on every page.
Pick the Project (required), and optionally a Task, Phase and Room.
Log as defaults to you.
Enter What are you doing? and pick the Service / Role (both required). The Billable toggle follows the service; change it if needed. + Add memo adds an internal note.
Click Start Timer.
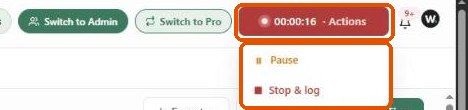
The entry appears on the Timelogs list straight away and the top bar shows a red running clock. Click it for Pause or Stop & log.

2. Add a past entry
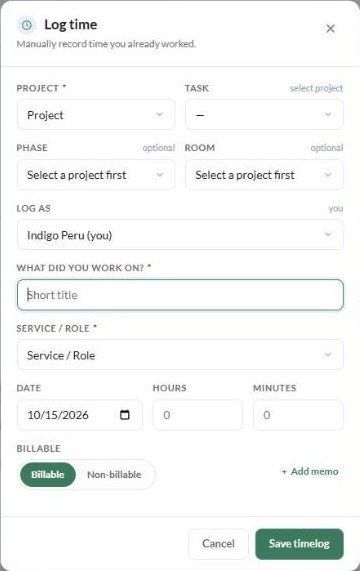
Click Log Time (top bar or the Timelogs page).
Fill in Project, the optional Task / Phase / Room, Log as, What did you work on? and Service / Role.
Set the Date, Hours and Minutes, and the Billable toggle.
Click Save timelog.
3. Import a CSV
See How to import timelogs.
Tips
Write the title the way you'd want it on an invoice line; keep internal detail in the memo.
Log to phases and rooms so budgets and phase billing reflect real hours.
Admins can log time for someone else with Log as.
Important limitations
The timer keeps running if you walk away — there's no idle detection. Pause it when you step away.
A timer stopped in under a minute logs 0h.
Related articles
How to manage and filter your timelogs
Billable vs. non-billable time
How to import timelogs
Was this helpful?
Still need help? Ask the team