Setting up email
Written By Timothy Murenzi
Workroom sends estimates, invoices, POs and other studio emails for you. There's no SMTP server to set up and no mailbox to connect — you just choose the name and address clients see.
Set your sender identity
Go to Settings → Studio → Outbound email.
Under Sender identity (studio-wide), enter:
From name — usually your studio name. This is what clients read.
From email — one address for the whole studio, whoever clicks Send. Replies go to this inbox.
The preview confirms what clients see, e.g. Clients see Studio <[email protected]>, and replies land in that inbox.
Click Send a test to check it arrives.
Click Save changes.
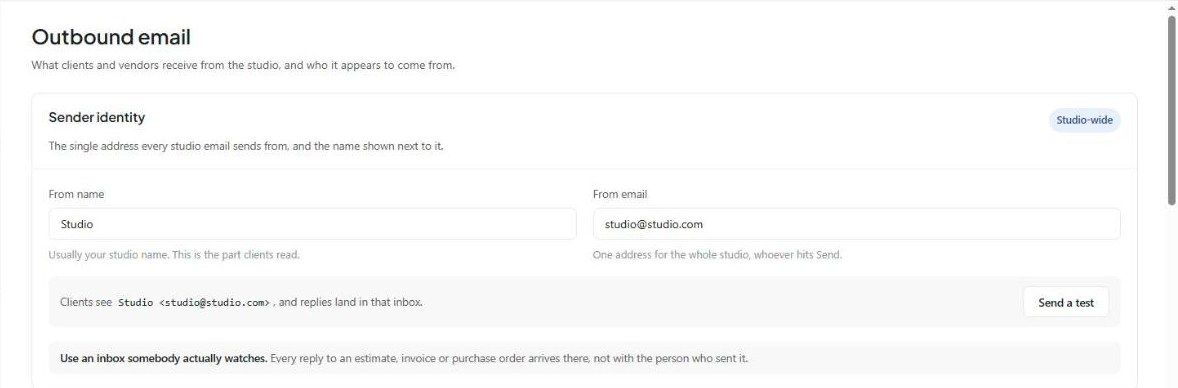
Use an inbox somebody actually watches. Every reply to an estimate, invoice or purchase order arrives there, not with the person who sent it.
The rest of the Outbound email page
Always copy — CC/BCC per document type. See How to BCC or CC email notifications.
Templates — the wording of each email. See Creating + Managing Email Templates.
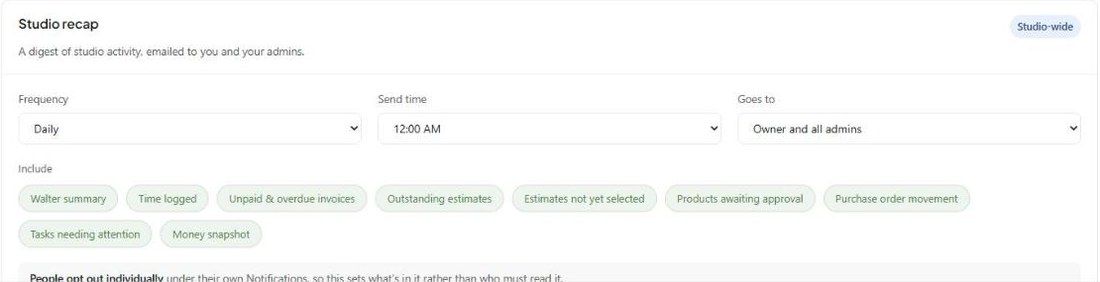
Studio recap — a digest of studio activity. Set the frequency (Off, Daily or Weekly), send time, and who it goes to (owner and all admins, owner only, or specific addresses). Choose what to include: Walter summary, time logged, unpaid and overdue invoices, outstanding estimates, estimates not yet selected, products awaiting approval, PO movement, tasks needing attention, and a money snapshot.
Automated report sending — Add schedule to email a set of reports on a repeating schedule.
Your own mailbox
To sync your personal email and calendar (for Comms and the Calendar), connect Google or Outlook under Settings → You → Connected accounts. That's per person and separate from the studio sender above.
Was this helpful?
Still need help? Ask the team