How to: Default Project Phases
Written By Timothy Murenzi
Set up your phases once and every new project starts with them. Phases also drive timelog approval, service rates and the WIP board.
Where to find it
Settings → Studio → Projects and phases. Phases belong to a Project type — for example Residential, Commercial, Residential (Furnishing Only) or Hospitality — so each type can have its own list.
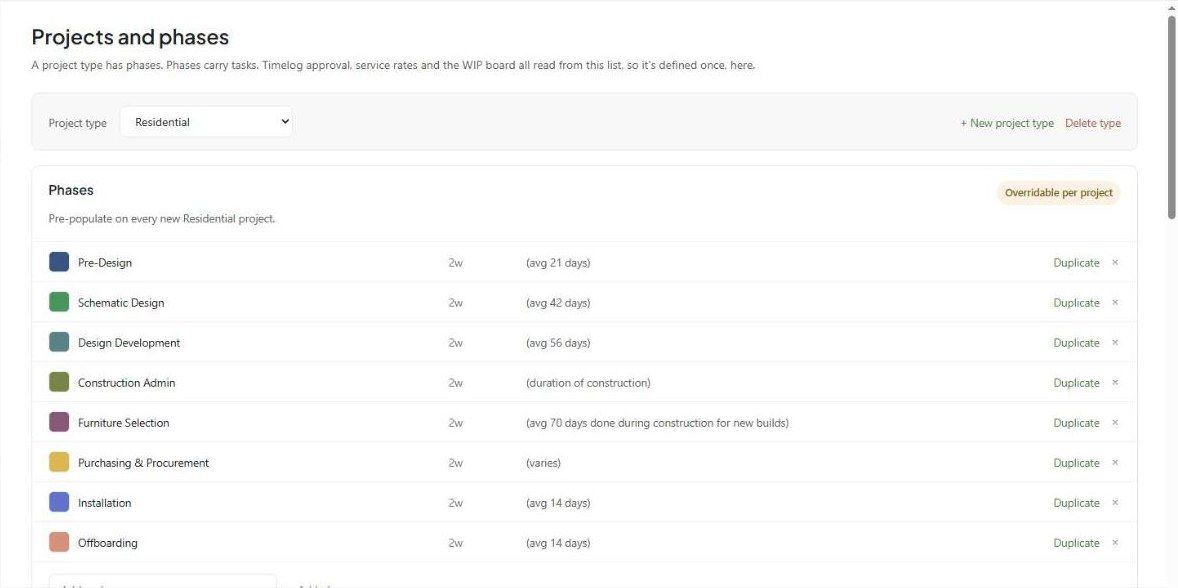
Set up phases
Choose a Project type, or click + New project type.
Under Phases, each row has a colour, a name, a default length (e.g. 2w) and a note (e.g. avg 21 days).
Click + Add phase to add one. Use Duplicate to copy a row, or × to remove it.
Click Save changes.
The Residential example list is: Pre-Design, Schematic Design, Design Development, Construction Admin, Furniture Selection, Purchasing & Procurement, Installation and Offboarding.
Task templates
Below the phases, Task templates are tasks that come with every new project of that type, each tied to a phase. Click + Add task to open the full task editor (labels, checklists, attachments, dates). Use Edit, Duplicate or × on existing templates.
Good to know
New projects only. Projects already underway keep their own phases. The list seeds new projects of that type.
Overridable per project. You can still add or remove phases on a single project.
Keep names consistent. Reports and timelogs group by phase, so consistent names keep them clean.
Use Delete type to remove a whole project type.
Example phase lists
Commercial / hospitality: Programming, Schematic Design, Design Development, Construction Documents, Bidding & Negotiation, Construction Administration, Punch List.
FF&E only: Specifications, Client Presentation, Approvals, Procurement, Receiving, Installation.
Was this helpful?
Still need help? Ask the team