How to Create an Invoice and Add Items from the Library
Learn how to create a new invoice and add products, services, and timelogs from your project library.
Written By Julia M.
Overview
Create an invoice and fill it from your Library: products, services, tracked time, project phases and reimbursable expenses.
Before you start
Pick the client and project first — the Library, time entries and phases are filtered by project.
Create the invoice
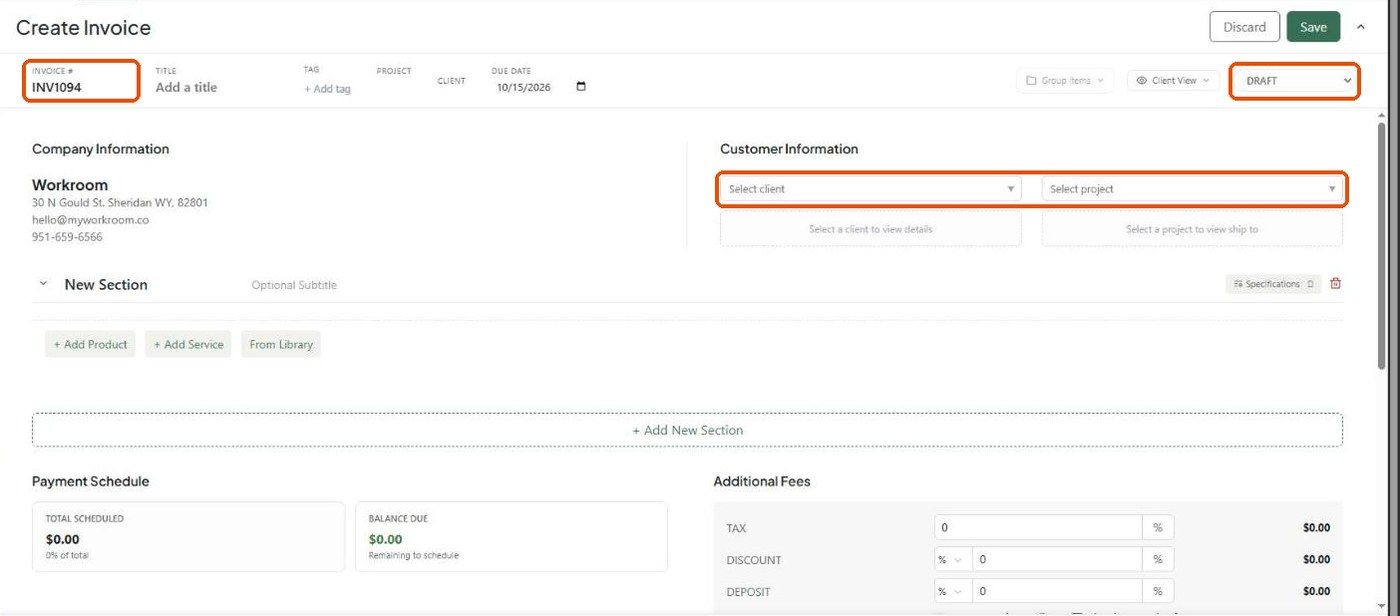
Go to Finances → Invoices and click Create Invoice. The editor can take a few seconds to load.
Under Customer Information, choose the client and project.
Optionally add a Title, Tag and Due date. New invoices start as Draft.
Add lines (below) and click Save.
Add from the Library
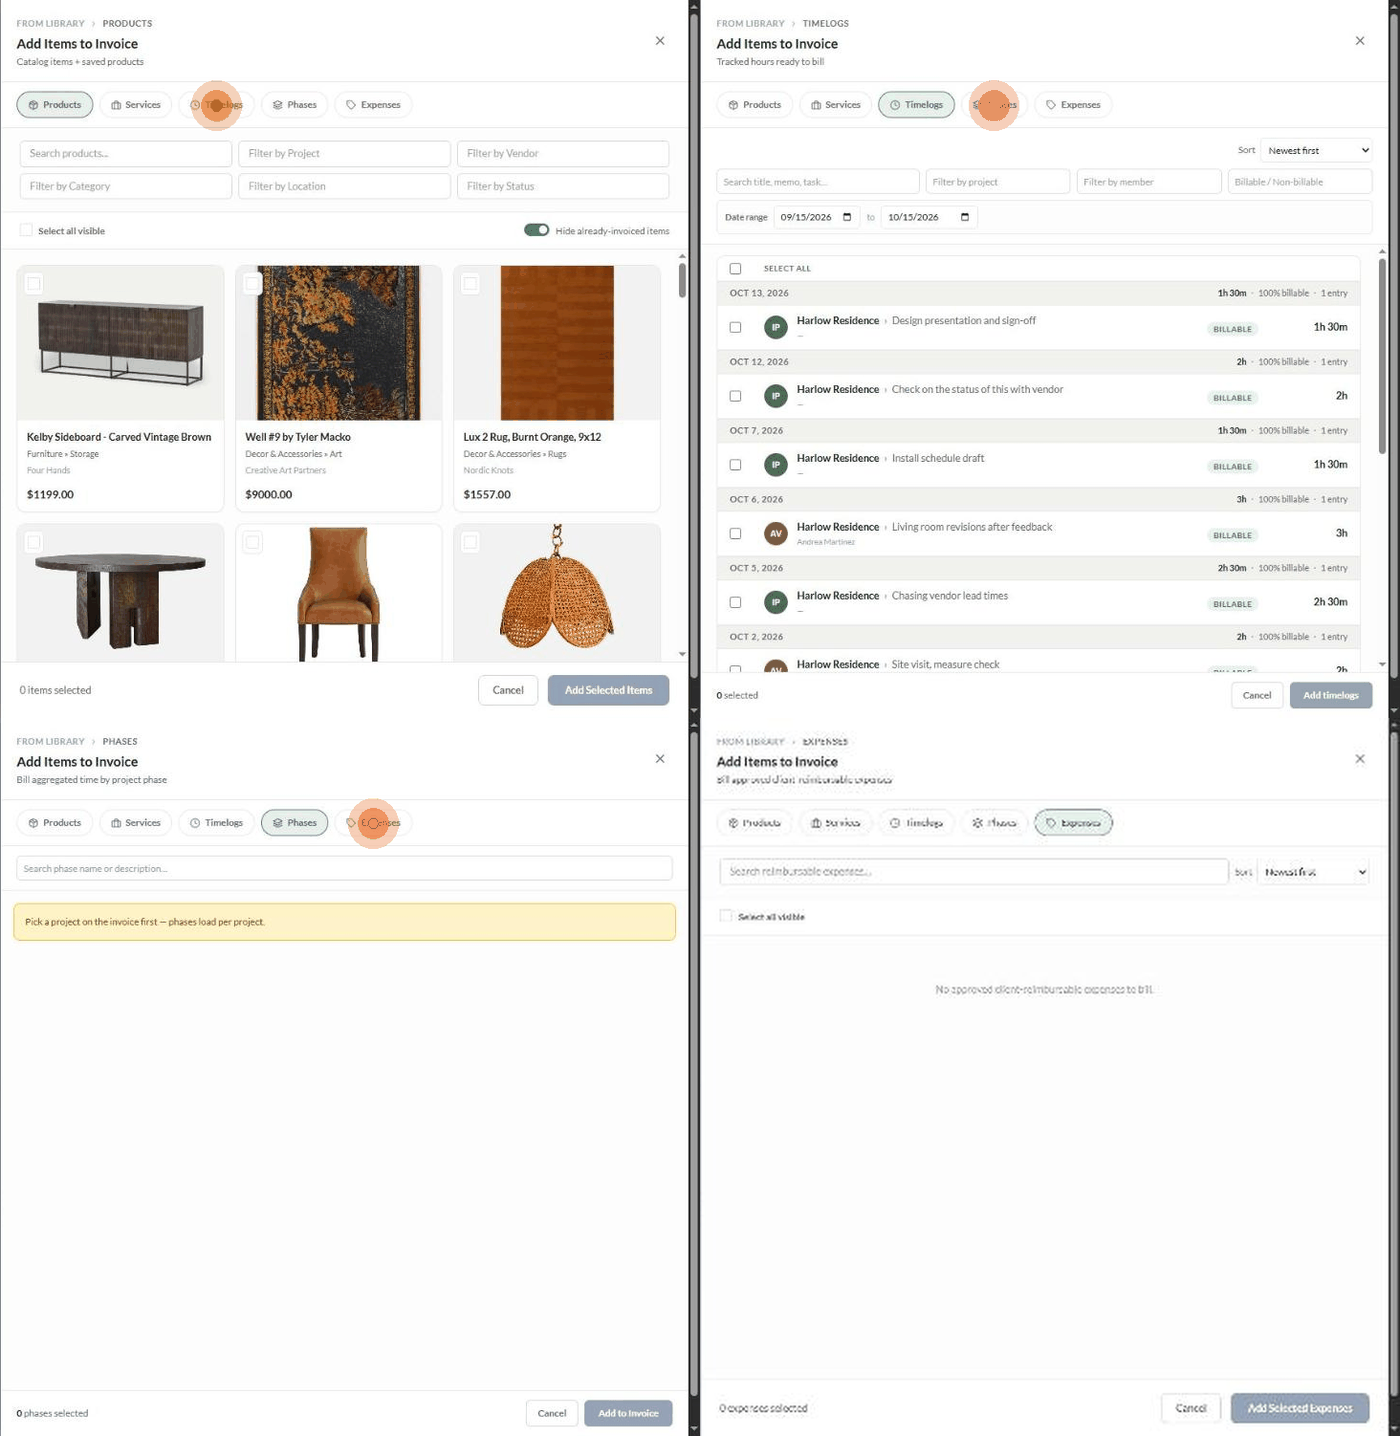
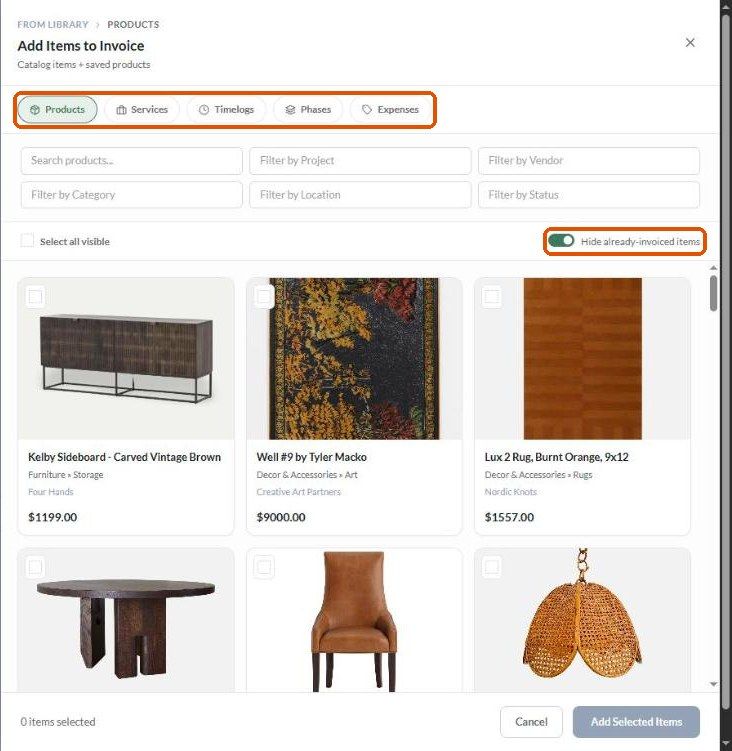
Click From Library in a section. The panel has five tabs:
Products — search and filter by project, vendor, category, location and status.
Services — design fees and other services.
Timelogs — tracked hours, grouped by date, with search, project, member, billable and date-range filters.
Phases — bill time totalled by project phase (choose a project on the invoice first).
Expenses — approved client-reimbursable expenses.
Hide already-invoiced items (on by default) hides anything already billed, to prevent double billing. Tick items and click Add Selected Items (or Add timelogs).
Add a one-off line
Use + Add Product or + Add Service for anything not in the Library.
Important limitations
Timelogs, Phases and Expenses are available on invoices, not estimates.
Products without a vendor can't be placed on a purchase order later.
Related articles
How to Configure the Invoice Client View and Display Settings
How to Send an Invoice to a Client
How estimates convert to invoices and invoices convert to purchase orders
Was this helpful?
Still need help? Ask the team