Sending a Contract for Signature
Written By Timothy Murenzi
Once the body and fields are ready, add your signers, choose the signing order and send. After that, you manage the contract from the Contracts list.
1. Add signers and choose the order
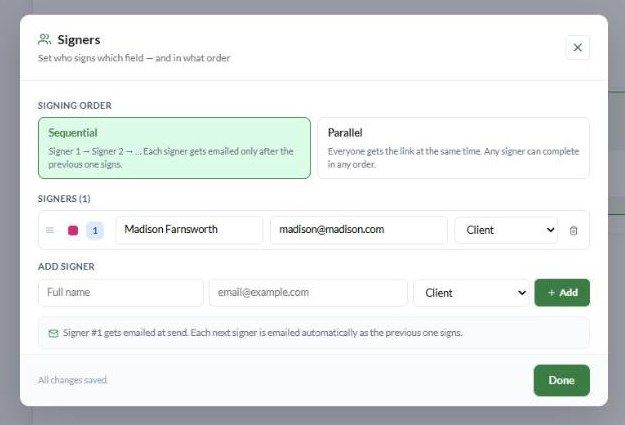
Click Signers in the editor header.
Under SIGNING ORDER, choose one:
Sequential — Signer 1, then Signer 2, and so on. Each signer is emailed only after the previous one signs.
Parallel — everyone gets their link at the same time and can sign in any order.
Under ADD SIGNER, enter a Full name and email, then pick a role: Client, Designer, Witness or Other. Click + Add.
Repeat for each signer. Drag the handle to reorder them, or use the bin to remove one. Each signer gets their own colour.
Click Done. The dialog saves as you go (All changes saved).
2. Assign fields
Every signer needs at least one Signature field assigned to them. Click each field and check its Assigned signer (see The Contract Editor).
3. Optional: add a retainer
Click Retainer to charge a deposit with the contract. See Retainer Payments.
4. Send
Click Send for signature. Workroom emails each signer a personal signing link — just the first signer in sequential mode, or everyone in parallel mode. The contract's status changes to Sent, and the editor becomes read-only.
Check before you send: the names and emails are right, every signer has a signature field, the retainer amount is right (or empty), and the signing order is the one you want. You can't edit the body after sending.
Tracking progress
The Status column shows the overall state: Sent, Viewing, Partially signed, Completed, Declined, Expired or Canceled. The Signers column shows each person's own state: Sent, Opened contract or Signed. Filter by All statuses to find contracts waiting on someone.
Row actions after sending
The ⋮ menu changes with the status.
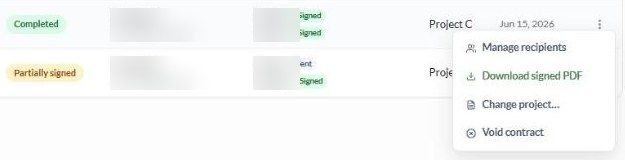
Manage recipients
Use Manage recipients to fix signer problems without touching the contract itself:
Resend invite — for a signer who hasn't signed yet.
Change who signs — edit an unsigned signer's name or email, then click Save changes. Changing the email cancels their old link and sends a new one.
Revert signature — clears a signer's signature so they can sign again.
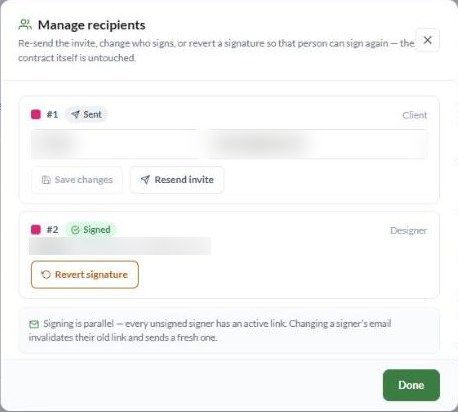
The note at the bottom tells you the signing mode. In parallel mode it reads: "every unsigned signer has an active link."
Deleting a contract
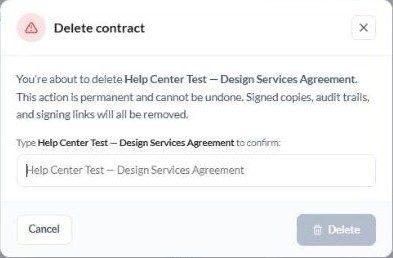
Delete contract is permanent. Signed copies, audit trails and signing links are all removed. To confirm, type the contract's exact name, then click Delete.
Need to change a sent contract?
You can't edit the body after sending. Delete the contract (or void it once it's completed), then create a corrected one. To avoid rebuilding it, save the original as a template before you send.
Troubleshooting
A signer didn't get the email. Check the address in Manage recipients, correct it if needed, and click Resend invite. Ask them to check their spam folder.
"Signing link expired or invalid." The link was replaced (the email was changed or the invite was resent) or the contract was deleted or voided. Resend the invite.
Send for signature doesn't work. Usually a signer is missing a signature field, or no signers have been added.
Someone signed with a mistake. Use Revert signature in Manage recipients so they can sign again.
Was this helpful?
Still need help? Ask the team