Getting started: enabling Automations and building your first one
Written By Timothy Murenzi
This walkthrough builds a real automation from a template — a reminder that goes out if a client hasn't signed their contract within three days — and switches it on.
Before you start
Automations lives in the left sidebar under Management. If you don't see it, it isn't enabled for your workspace or your permission set — ask your workspace owner, or check Settings → Studio → Team and rates → Permission sets → Automations.
Build your first automation
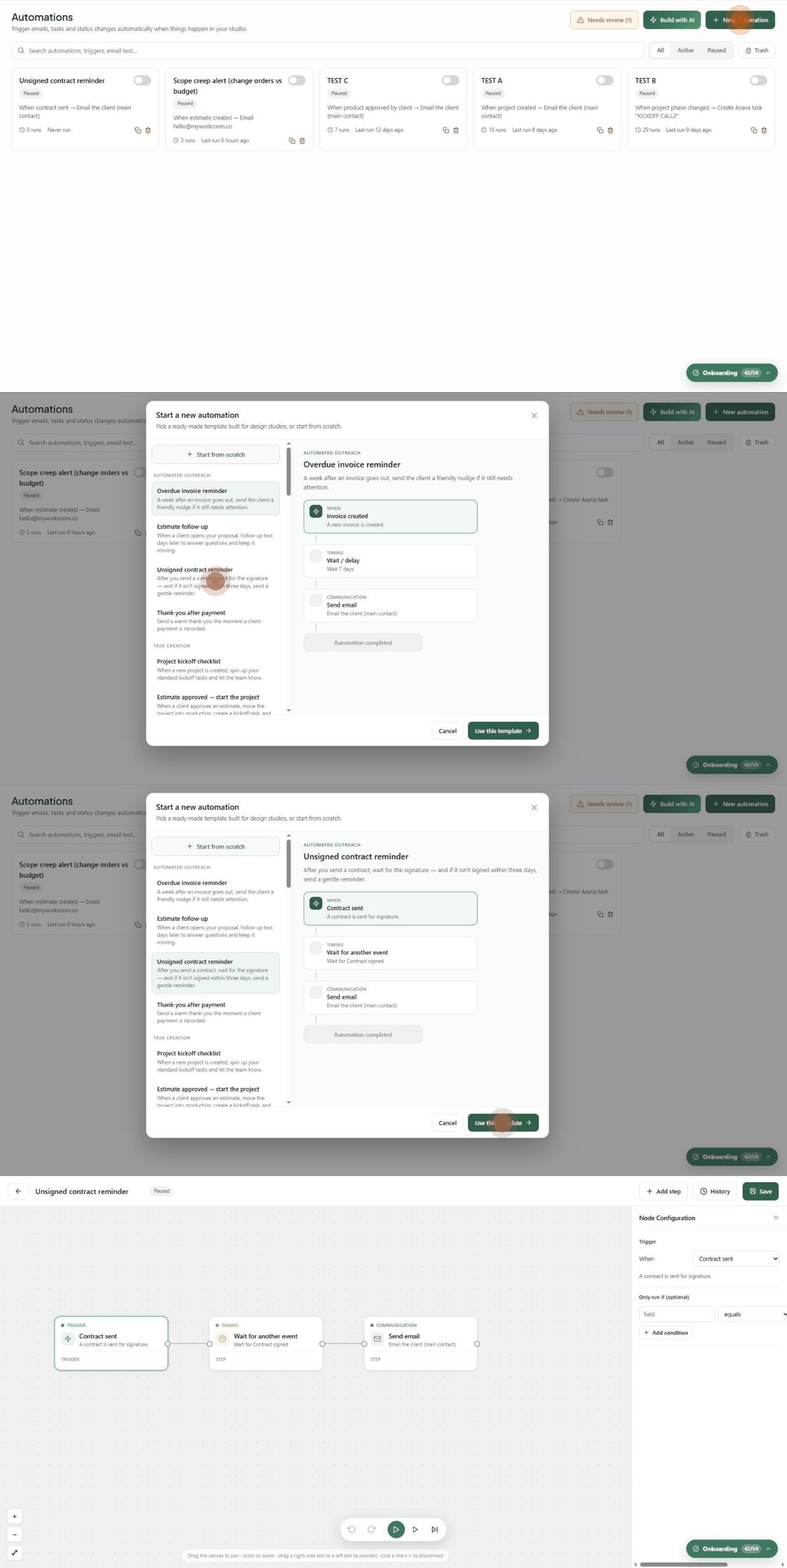
Go to Automations and click + New automation.
The Start a new automation window opens. Pick a template on the left (here, Unsigned contract reminder under Automated outreach) — the right side previews its steps. Or click Start from scratch for a blank canvas.
Click Use this template. The builder opens with the trigger and steps already in place.
Click each card to check its settings in the Node Configuration panel on the right:
Trigger — When: Contract sent.
Wait for another event — Wait for: Contract signed, Timeout after: 3 days, If it never happens: Continue anyway.
Send email — To: The client (main contact). Click Open email editor to read and personalise the message.
Click Save at the top right. You'll see Automation saved.
Click the green ▶ button at the bottom of the canvas to fire a test event (see Managing your automations).
Click ← to return to the list, and flip the automation's switch on. Its status changes from Paused to Active.
That's it. The next time you send a contract, Workroom watches for the signature and sends the reminder only if it hasn't arrived after three days.
Finding your way around the builder
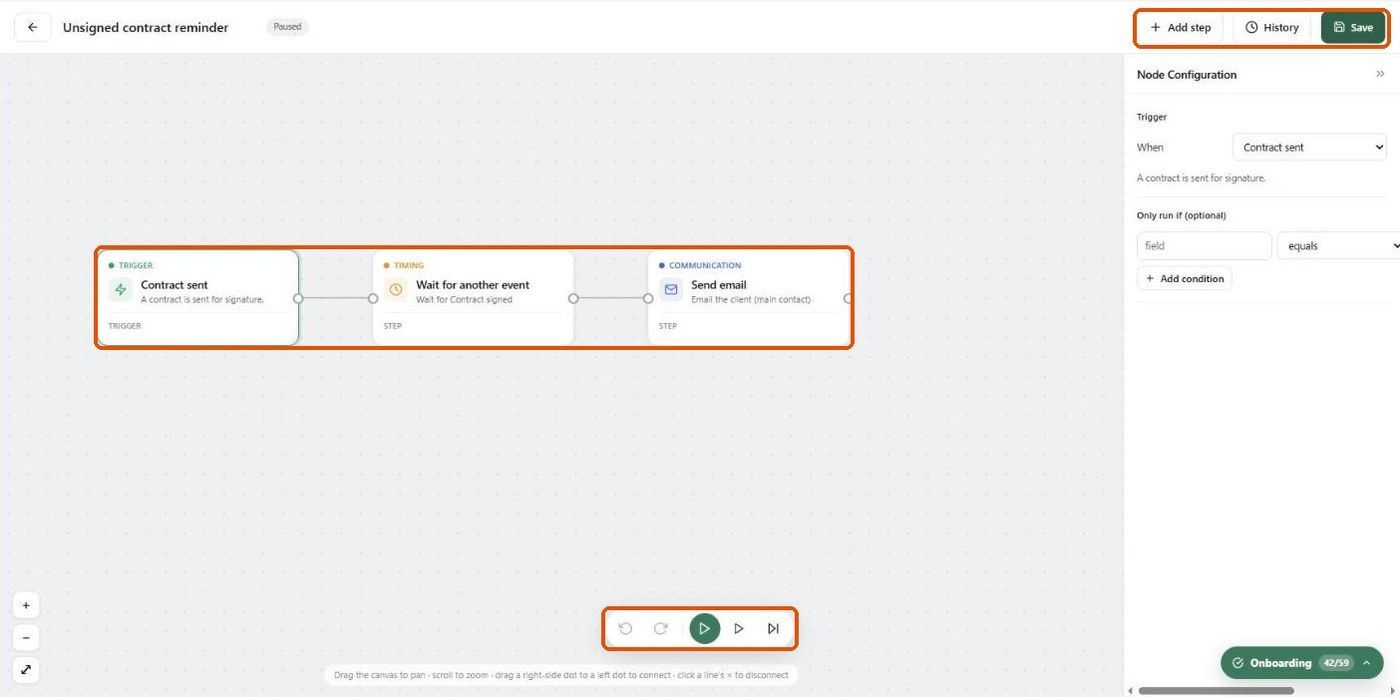
Canvas — drag the background to pan and scroll to zoom; the + / − / ⤢ buttons at bottom left zoom and fit everything on screen.
Cards — click one to edit it on the right. To remove a step, select it and click the bin icon at its top-right corner.
Connecting steps — drag from a card's right-hand dot to the next card's left-hand dot. Click the × on a line to disconnect.
+ Add step — adds a new step (see Actions & steps reference).
History — the run history for this automation.
Save — saves your changes (it reads Saved when there's nothing new).
Bottom toolbar — undo, redo and the green ▶ test button.
Was this helpful?
Still need help? Ask the team