Building your first form
Written By Timothy Murenzi
This walkthrough builds a form from scratch and publishes it.
1. Create the form
Go to Forms and click + New form.
Choose Blank form to start fresh (or From template — see Building from a template).
The builder opens. Give the form a name — it's the heading people see on the public page — and add a short intro in Form settings → Description.
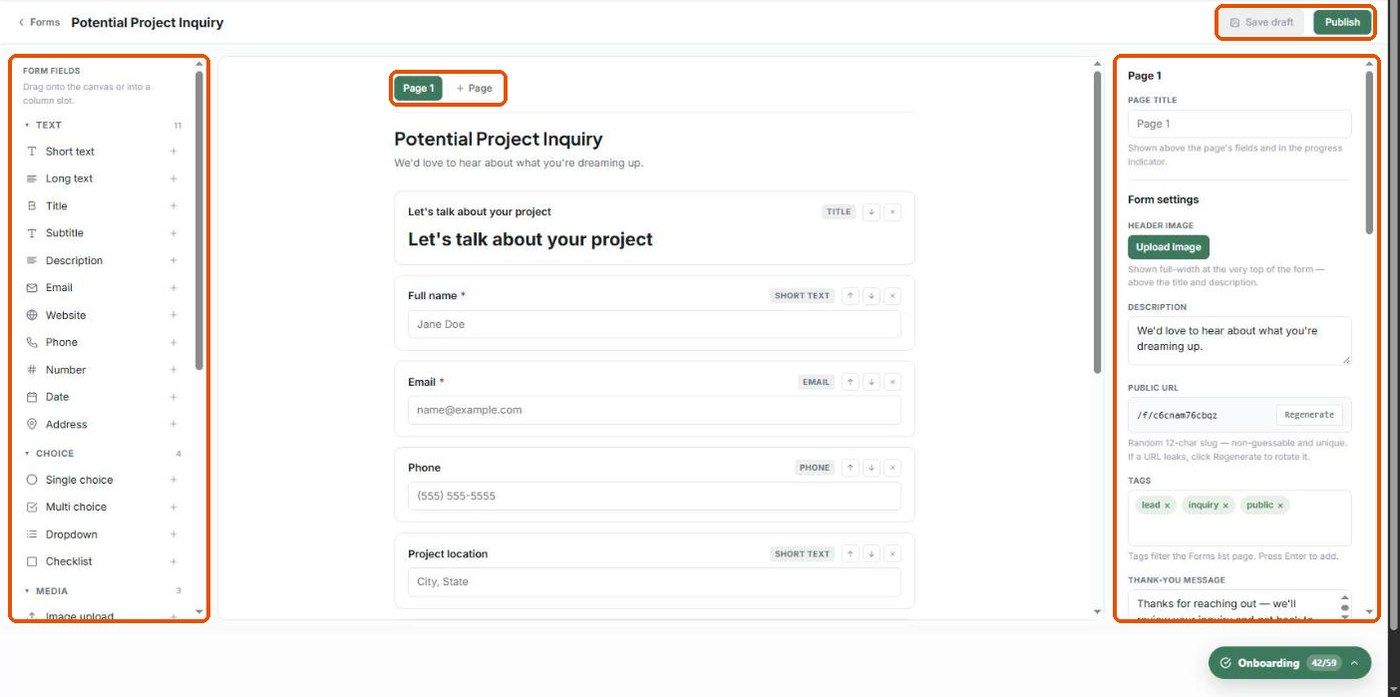
2. Add fields
The Form fields palette on the left is grouped into Text, Choice, Media, Rating, Special and Layout.
Click a field (or its +) to add it to the bottom of the current page, or drag it onto the canvas — including into a Columns slot.
Use the ↑ ↓ arrows on a field card to reorder it, and × to remove it.
3. Set up each field
Click a field on the canvas. The right panel switches to Field settings:
Label — the question.
Description — optional helper text shown under the label.
Placeholder — example text inside an empty box.
Required — the responder must answer before they can submit (shown with a red *).
Conditional logic — only show the field when an earlier answer matches (see Multi-page forms + conditional logic).
Plus settings specific to the field type (choices, star count, rooms, and so on).
Click an empty area of the canvas to get back to the page and Form settings.
4. Save and publish
Changes save automatically after a moment — the header shows Unsaved changes while you work and Saved once stored. Click Save draft to save straight away.
Click Publish when you're ready. The header then shows the form's public link (e.g. /f/c6cnam76cbqz) — click it to open the live form — and the button changes to Unpublish.

Next: share the link or embed it on your website (see Sharing your form).
Was this helpful?
Still need help? Ask the team