Creating and running meetings
Written By Vinod Kumar Alluri
Meetings are the one thing the Calendar creates and owns. Everything else — deliveries, order-by dates, invoices, tasks — comes from the record it belongs to. This article walks through creating a meeting, inviting people, answering invitations and setting up saved meeting locations.
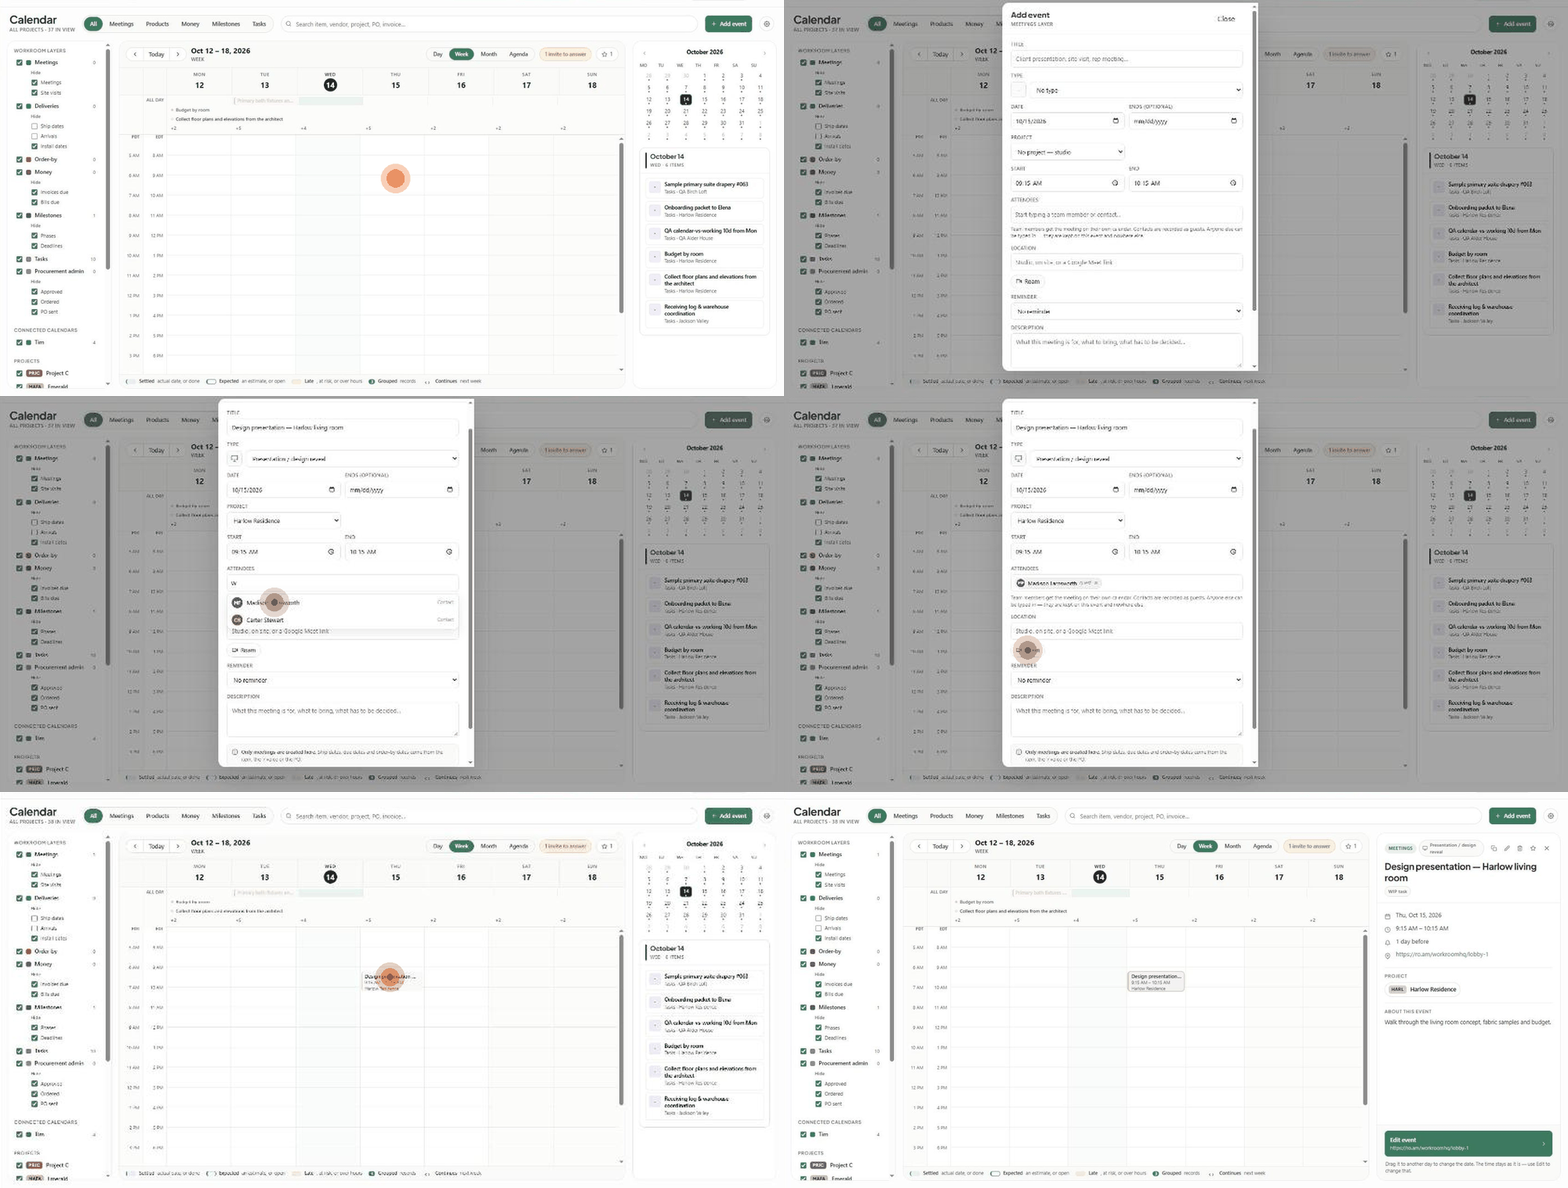
Create a meeting
Go to Calendar in the left sidebar.
Open the Add event window in one of two ways:
Click + Add event at the top right. The date defaults to today, 10:00–11:00 AM.
Or, in Day or Week view, double-click an empty time slot. The date and start time are filled in for you, snapped to the nearest 15 minutes, with a one-hour end time.
Enter a Title — for example "Design presentation — Harlow living room".
Choose a Type (optional). The icon beside the dropdown updates as you choose, so you can see exactly what will be drawn on the calendar.
Check the Date. To make it a multi-day event, set Ends (optional); leave it blank for a single day.
Pick a Project, or leave it on No project — studio. Linking a project shows the project chip on the event and lets the project filter find it.
Set Start and End. Clear both for an all-day event.
Add Attendees — start typing a team member or contact name and pick from the list (see Who gets invited below).
Fill in Location — type it, or press one of the saved location pills underneath (for example Roam) to fill it in one click. Press the pill again to clear it.
Choose a Reminder: No reminder, 10 minutes, 30 minutes, 1 hour, 2 hours, 1 day, 2 days or 1 week before.
Add a Description — what the meeting is for, what to bring, what has to be decided, or dial-in details.
Click Create event.
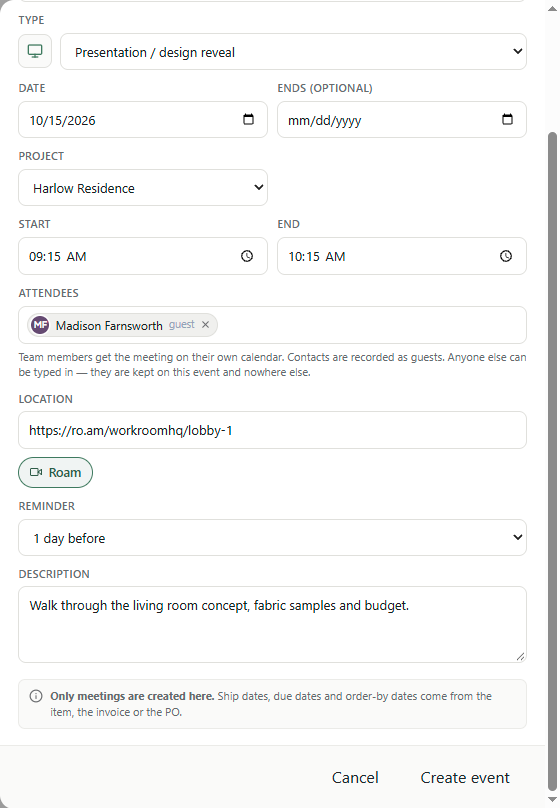
Why there's no layer picker. The window is titled Add event · Meetings layer and only creates meetings. If it let you create a delivery, that date would live in two places — on the calendar and on the product — and the purchase order would never learn about it. As the note at the bottom of the window says, ship dates, due dates and order-by dates come from the item, the invoice or the PO.
The 18 meeting types
"No type" is fine too. The type appears as a pill at the top of the event panel.
Who gets invited
The Attendees field accepts three kinds of people, and each is treated differently. The hint under the field sums it up:
Team members get the meeting on their own Workroom calendar, with an Are you going? prompt. They are deliberately not sent a separate Google/Outlook invitation — the meeting is already on their Workroom calendar, and a second notification for the same event is noise.
Contacts are recorded as guests (shown with a guest tag in the field). If a contact has an email address on file and the meeting syncs to your Google or Outlook calendar, they're added as a guest on that invitation.
Anyone else can be typed in. Text like "Sarah's architect" is kept on this event as a note of who's coming, and nowhere else. Workroom never guesses an email address from a name, because a guess could send an invitation to the wrong person.
The event panel
Click any meeting to open its panel on the right. It shows the type pill, title, date, time, reminder, location (a URL becomes a clickable link, so "join the call" is one click away), project, guests and description.
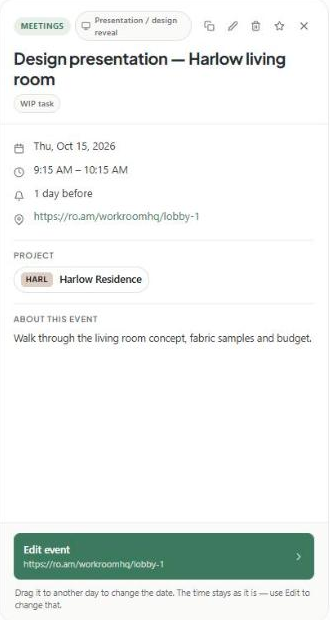
The icons along the top of the panel let you duplicate, edit, delete or flag (star) the meeting, or close the panel. You can also click the green Edit event bar at the bottom.
Answer an invitation (RSVP)
When someone invites you, an orange "1 invite to answer" button appears above the calendar grid. Click it to jump to the meeting.
In the panel, under Are you going?, click Accept or Decline.
The panel confirms your answer (for example You are going.), and the Guests summary updates — e.g. from "1 guest | 1 awaiting" to "1 guest | 1 yes".
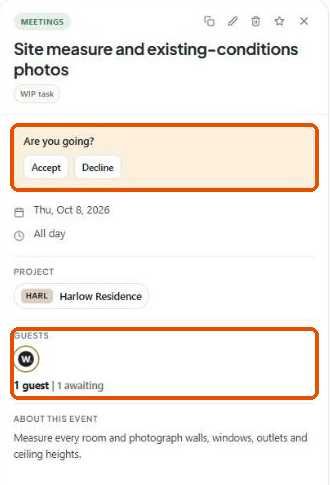
Guests who are Workroom users show their profile photo; everyone else shows initials. You can change your answer at any time by pressing the other button.
Set up frequent meeting locations
Save the handful of places your meetings actually happen — your video room, the office address, a mobile number for site calls — and they'll appear as one-click pills under the Location field.
Go to Settings → Studio tab → Calendar.
Under Frequent meeting locations, click + Add a location.
Choose the type using the icons: video link, phone or address. The icon you pick is the icon shown on the pill.
Give it a name — what you call it: "Studio room", "Office", "Site mobile".
Enter the value — the URL, phone number or address.
Click Save changes at the bottom of the page.

Locations are studio-wide, so everyone on the team sees the same pills. To remove one, click the bin icon at the end of its row.
Always name your locations. A video link with no name shows as the raw URL on the pill — exactly the thing this feature exists to avoid.
Was this helpful?
Still need help? Ask the team