How to add a vendor
Vendor records store everything about your trade accounts -- contact details, login credentials, rep information, and pricing defaults that flow into your product catalog.
Written By Julia M.
Add vendors — showrooms, fabric houses, lighting suppliers and so on — so you can source products from them and send them purchase orders.
Step by step
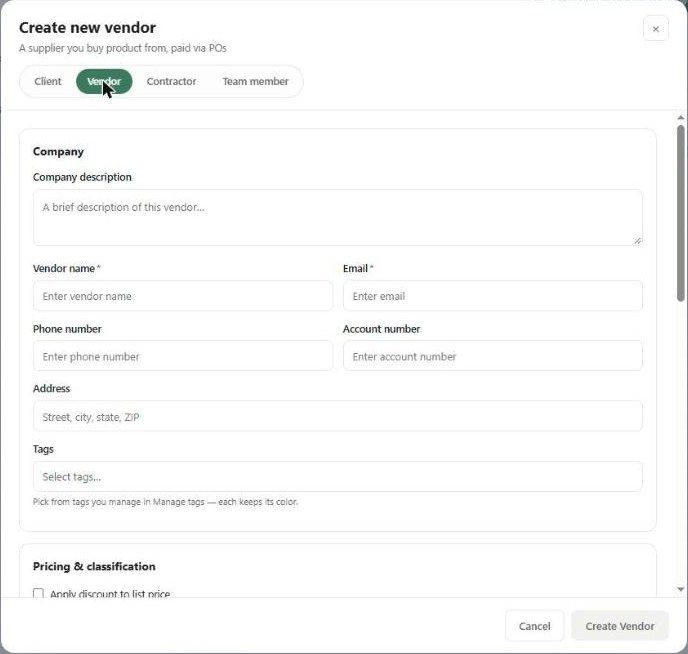
Go to Contacts → Vendors and click + Add Vendor. Or click + Add Contact and choose the Vendor tab.
Company — Vendor name and Email (both required), phone, account number, address, and tags. Use Company description for the vendor's category or specialty (e.g. "Upholstery, Lighting") — it's searchable.
Pricing & classification:
Apply discount to list price — when on, products carry a list price and the cost is worked out from it.
Trade discount %, Default markup % and Landed multiplier — these pre-fill on products from this vendor.
Site details — the vendor's trade portal Login URL, Username and Password.
Vendor payouts — Send vendor signup link emails the vendor a hosted page where they choose how to be paid.
Representatives — add one or more reps with + Add rep, and mark the Default one.
Purchase orders:
Don't create POs for this vendor — hides them from the PO creation flow.
Disable email notifications — applies to all reps too.
1099 contractor — includes them on QuickBooks 1099 reports. Enter their tax ID in QuickBooks.
Click Create Vendor.
The vendor list and profile
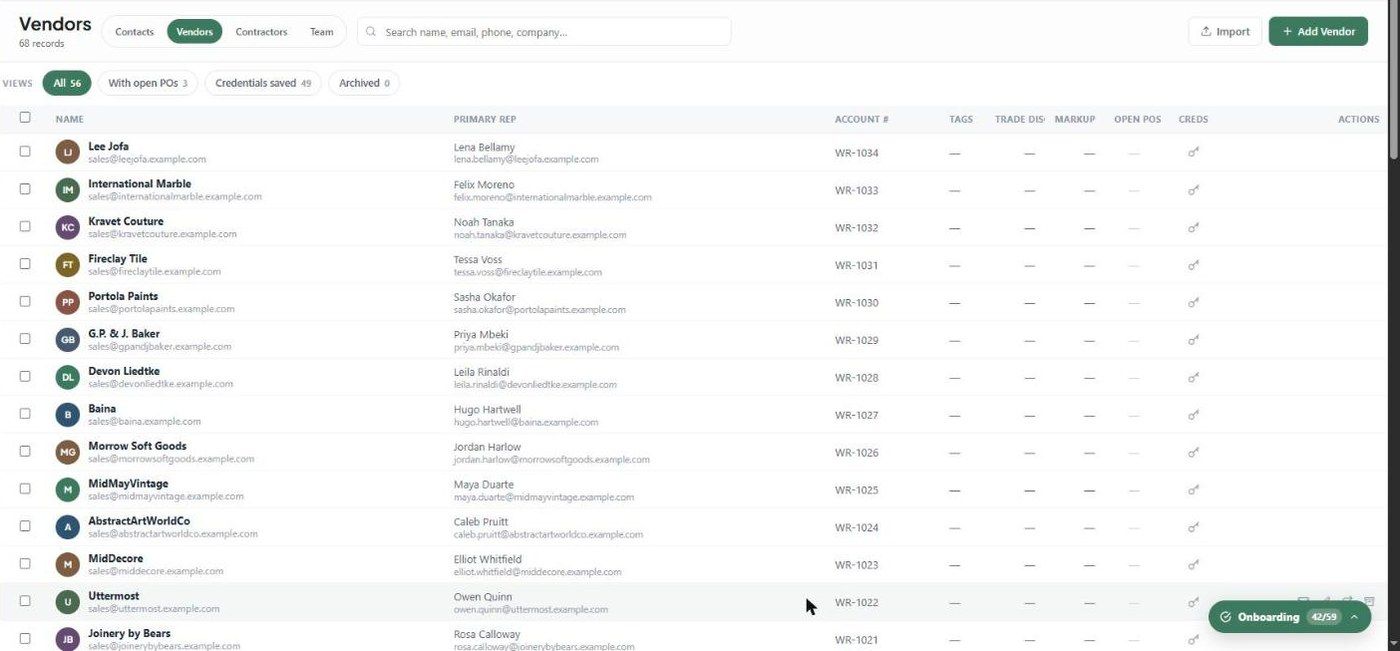
The Vendors list shows each vendor's primary rep, account #, tags, trade discount, markup, open POs and a Creds key icon when credentials are saved.
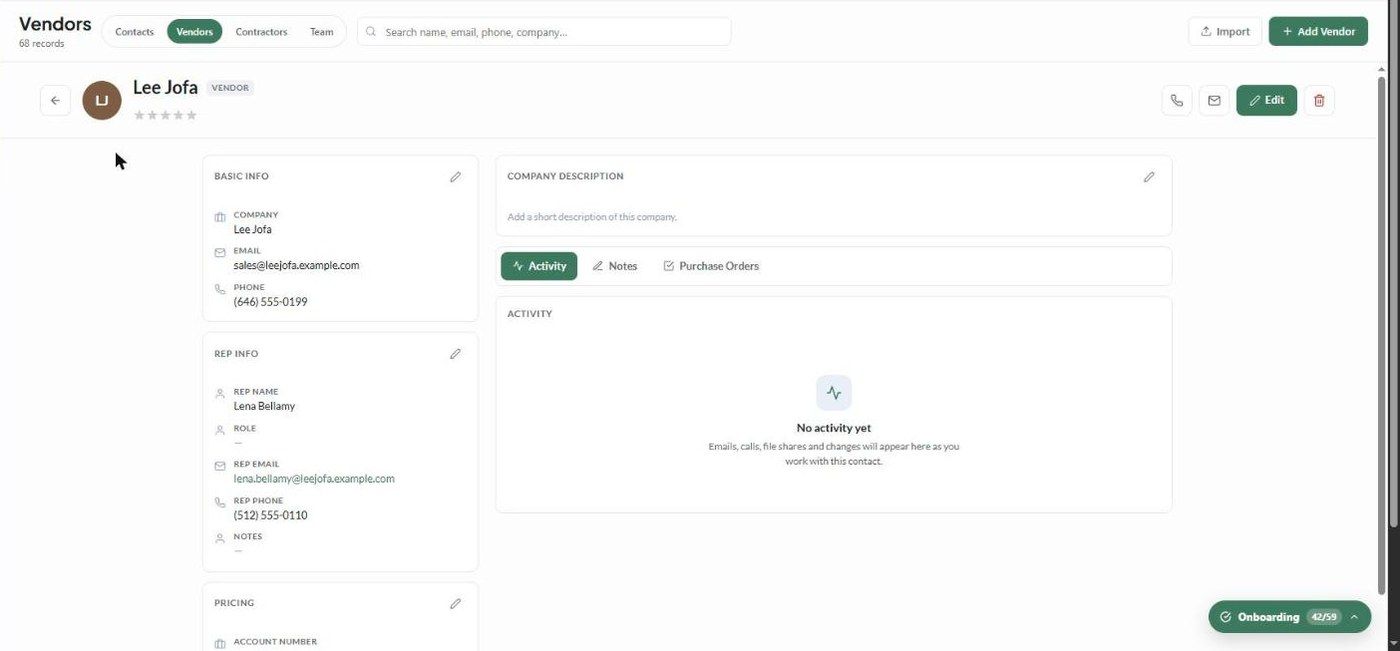
Click a vendor to open its profile:
Basic info, Rep info and Pricing
Company description
Activity, Notes and Purchase Orders tabs
What happens next?
The vendor's pricing defaults are applied to products you add from them.
The vendor appears in the PO creation flow, unless you ticked Don't create POs.
Important limitations
Vendor name and email are required.
Pricing defaults apply to products added after you set them. Existing products keep their own pricing.
Related articles
Overview of Contacts
How to import contacts and vendors
Was this helpful?
Still need help? Ask the team