Creating + Managing Email Templates
Written By Timothy Murenzi
Every estimate, invoice, purchase order and contract email the studio sends uses a template. You can edit the subject and body of each one.
Where to find them
Settings → Studio → Outbound email → Templates. Pick a template:
Estimate
Estimate follow-up
Invoice
Invoice follow-up
Retainer
Purchase order
Purchase order follow-up
Contract invite
Contract signed
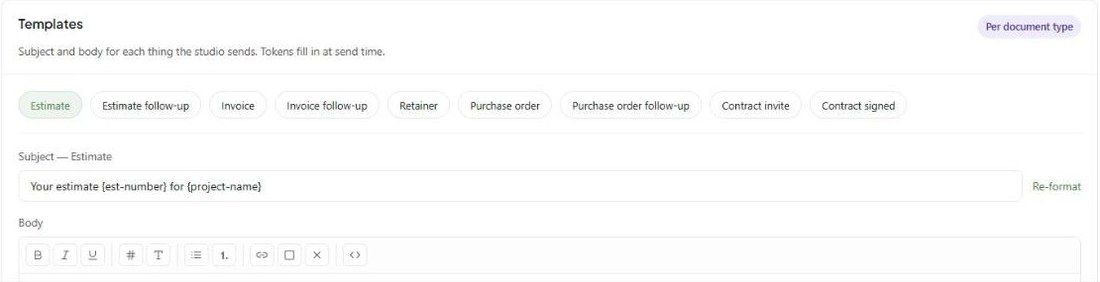
Edit a template
Click the template.
Edit the Subject (e.g. Your estimate {est-number} for {project-name}). Re-format tidies it up.
Edit the Body. The toolbar has bold, italic, underline, headings, lists, links, a button block and a source (<>) view.
Click a token chip below the body to insert it where your cursor is.
Click Save changes.
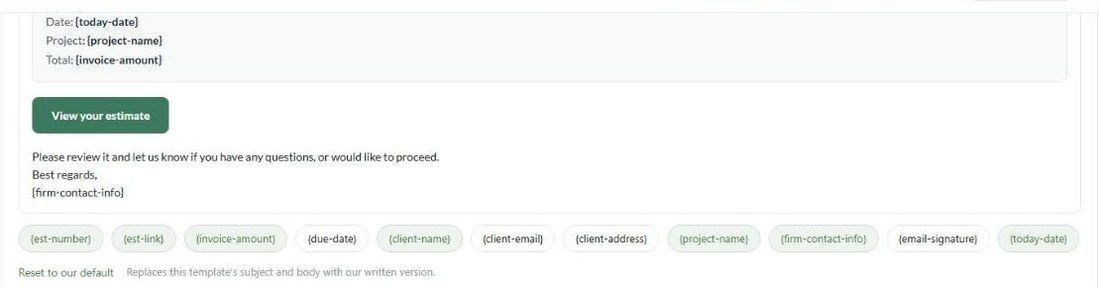
Reset to our default replaces the template's subject and body with Workroom's version.
Tokens
Tokens fill in when the email is sent. The chips under each template show the ones it supports. For the Estimate template these are:
{est-number},{est-link},{invoice-amount},{due-date}{client-name},{client-email},{client-address},{project-name}{firm-contact-info},{email-signature},{today-date}
Other templates offer their own, such as {inv-number}, {inv-link}, {po-number}, {po-link}, {vendor-name}, {contract-link} or {portal-url}. Always use the chips under a template, so you only insert tokens it can fill.
Related
Who emails come from: Setting up email.
Copying yourself on emails: How to BCC or CC email notifications.
Was this helpful?
Still need help? Ask the team