Creating custom headers
Written By Timothy Murenzi
Overview
Control the top of your estimate, invoice, purchase order and contract PDFs in two places: studio-wide branding in Document look, and per-export header toggles in the PDF export panel.
Add a header banner and branding
Go to Settings → Studio → Money and open Document look.
Under PDF header banner, click No image — click to upload and choose your image.
Adjust Font, Body size, Primary colour, Text colour and Use the company logo on every document.
Choose where Terms print: at the bottom of the signatures page, or on their own page after the totals.
Use the Preview (switch between Estimate, Invoice and Purchase order) and click Save changes.
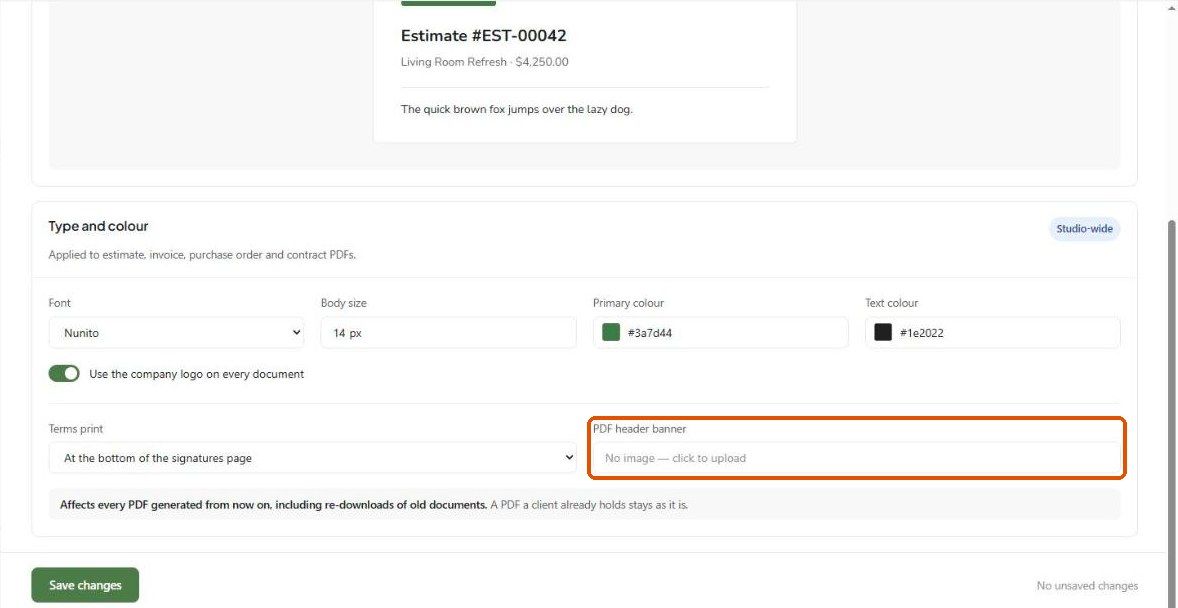
The banner sits at the very top of each PDF.
Choose header details per export
In the PDF export panel, the Header group toggles Company Logo, Company Info, Bill To Address, Ship To Address and Estimate/Invoice Details for that download.
Important limitations
Document look changes affect every PDF generated from then on, including re-downloads of old documents. PDFs a client already has don't change.
Company name, address and logo come from Settings → Studio → Company.
Related articles
How to customize and download the estimate PDF
Was this helpful?
Still need help? Ask the team